It’s an incredible relief when you get the sound just right, however, the more I talk to filmmakers, the more I realise it’s just not as intuitive as I could be.
Allow me to make life a little easier for you.
Below are some of my favourite tutorials from companies such as Bubblebee Industries, Sennheiser, etc.
Note: I’m not officially endorsing any of these products. I’m not getting anything from them, I just like these videos and products and wanted to share them with you so you can benefit from them too.
Scroll down or click the links below to see videos and tutorials on:
- Lavalier Mic Technique
- Wireless Radio Microphone techniques
- 1 and 2 person interview audio setup
- How to prepare your space for sound easily and cheaply
- Setting your audio levels – There’s a trick here
Lavalier Microphone Mounting tutorials
In my years working with filmmakers I’ve found one particular thing to be the common pain in the A***. Noisy Lavalier microphones. I’ve mounted these things thousands of times now and have pretty much got the method down.
Some mounting systems are better than others for particular applications such as Hide-a-mic, Rode “Invisilav”, Rycote “Stickies” & “Overcovers” (don’t bother with their “Undercovers”, Ursa “Minimounts”, etc. But in my experience, there is one system that seems to work for most scenarios. Bubblebee Lav Concealer. (I’m not sponsored by anyone, just sharing what I’ve found.)
So, have a look at these videos to get your lav mounting game on.
Using fur to mitigate chest hair noise
Rycote Stickies and Overcovers
8 Lavalier mic hiding tips
Hide a mic on a bra
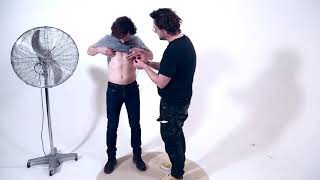
Hide a mic under a t-shirt
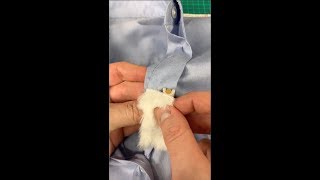
Using fur to mitigate chest hair noise
This video by Ursa shows a little trick using fur to stop chest hair from interfering with your lavalier mic sound.Rycote Stickies and Overcovers
This video shows how to use Rycote Stickies and Overcovers to mount Lavalier microphones.8 Lavalier mic hiding tips
This video shows 8 different ways to hide a lavalier microphone using Bubblebee's Lav ConcealerHide a mic on a bra
This video shows how to use Bubblebee's Lav Concealer to hide a mic on a braHide a mic under a t-shirt
This video shows how to use Bubblebee's Lav Concealer to hide a Lavalier microphone under a t-shirt
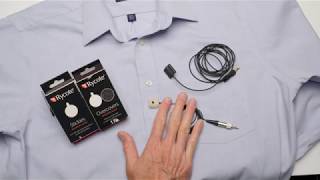
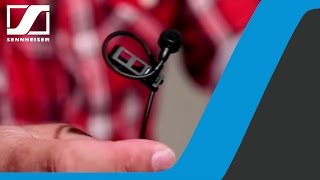
Sennheiser Wireless Mic Tutorial
This is a cute little 10min video that Sennheiser has made to help you understand their wireless mic system. A lot of filmmakers use these kits and so I’m sure you’ll find this really helpful. Even if you don’t have a Sennheiser mic, the principles stand for any wireless mic kit.
Wireless radio and mic setup
Wireless radio and mic setup
This cute video from Sennheiser shows all you need to know to correctly set up your wireless radio mics, including the things you didn't know you had to think about.
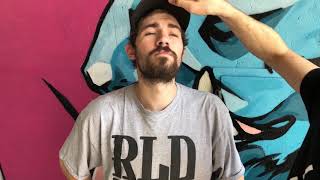
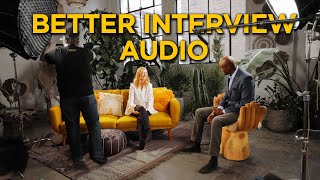
Interview Audio Setup
This video from Deity Microphones (Again, not a sponsor) is a really great tutorial on how to physically set up your mics in an interview situation, taught by pro sound recordist, Marlon Clarke.
Then another really great video on how to mic a 2 person interview.
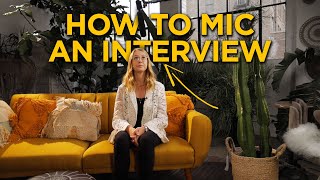
How to mic a 2 person interview
How to mic an interview
How to mic a 2 person interview
This is a great video on how to set your sound up for a 2 person interview. There are things in here you never would have thought of.How to mic an interview
This video is a great guide on how to set your sound up for a single person interview.
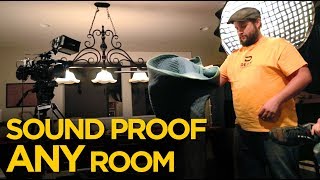
Preparing Your Space For Sound
One of the most overlooked aspects of filming is the space you’re filming in. I’ve been in so many untreated photo studios and living rooms that have had to be treated to take away the echo, and I imagine you’ve been in that situation too. It’s too late to think about removing the echo in post, so I think it may be helpful to get some idea on the easy ways you can reduce echo right up front, and do it without fancy sound treatment equipment.
This video shows you how to do it on a budget using removalist blankets. In Australia, you can get these at Bunnings. (No sponsor)
Prepare your space for sound
Prepare your space for sound
How to drastically improve your echoey space for much better quality sound.
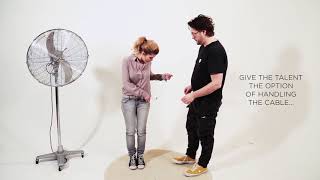
Setting Audio Levels for Recording
This has often been a bit of a guessing game for most filmmakers I’ve spoken to, and as such, the results can be a bit hit and miss. The audio can either clip and distort, or it just sounds too low in the noise floor, mixed in with room tone, mic noise, and background noise.
However, there are a few basic rules you can apply right at the start to make sure you get it right every time. (Well, nearly every time)
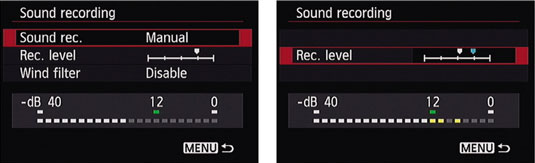
Caution: You’ll read a fair bit about getting it just below 0dB for youtube videos and somewhere around -8dB for others, etc, but please understand, this is something you need to do in post, not while recording.
Setting levels too high will invariably end up with clipped (distorted) audio.
Setting it too low can drop your dialogue into the noise floor and make it difficult to separate the voice from mic noise, room tone, and background noise.
There is a sweet spot and that is generally somewhere around -10dB to -12dB. Personally, I go somewhere between -12 and -15 on average. I’ve been caught out too many times with a loud laugh or an over-excited moment.
However, there is a trick to setting this level and it has nothing to do with the technical side at all …
Get the talent to speak the same as they are going to in the recording.
Don’t make the mistake of asking them to just say “Test, test, 1, 2.” You won’t get the right levels.
Normally at this point, your talent can be a bit nervous and will speak somewhat quieter and more reserved than when they will be during the shoot.
The trick is this: Get them talking about something they’re interested in.
Ask them what their favorite food is, or where they took their last break. Get them talking properly, and if possible make them laugh. Make sure you engage and at least look interested in what they’re saying, while at the same time have one ear on your headphones and take sneak peeks at your level meter on your camera’s or recording device’s screen. Now, just keep them talking until you have the levels set.
However, don’t stop there. Allow them to finish the conversation naturally and don’t just cut them off when your levels are right. I realise you’re most likely in a rush, but it’s of vital importance to keep your talent comfortable and there’s nothing more isolating than making them feel like their personal interests are just a utility service just for getting your levels right. This may just seem like common sense to you but in the pressure of the moment, getting everything set up just right, it’s easy to forget the emotional needs of your talent.